Adding, Editing or Deleting emails whether they are POP3 or IMAP can be done easily through the EPhost WINDOWS HOSTING PLANS.
To add, edit or delete an email account, you will need to login to your Control Panel using the information provided to you in your Welcome Email.
If you no longer have the login information, please send an email to support@ephost.com requesting a copy of your Welcome Email.
 There are three types of email accounts:
- POP3/IMAP: This type of email account is a normal email account that you can use to store, send and receive email. IMAP users, even though this feature is noted as POP3 you would use this to add a IMAP account as well. Simply setup the account as IMAP in your email client.
- Email Alias Email: This type of email account allows to to create an email account that forwards to another email account. e.g. "sales@your_domain.com" would forward to "you@some_domain.com."
- Group: Group email addresses are just like Email Alias addresses in that they forward to another email account. The only difference, is that you can specify one or more email addresses in which to forward the message. e.g. You could make "sales@your_domain.com" would forward to "you@some_domain.com" AND "coworkeer@some_domain.com."
The procedure for creating a new POP3/IMAP, Email Alias or Group is the same. Start by clicking on the icon for the particular type of email account you want.
 Instructions for E-Mail:
- Login to your web hosting account.
- Click on the Control Panel button for that hosting plan.
- You will be logged into the Control Panel automatically.
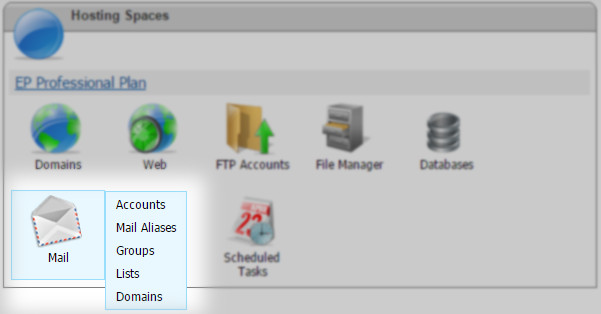
- Click on the Mail Icon >> 'Mail Accounts' Window
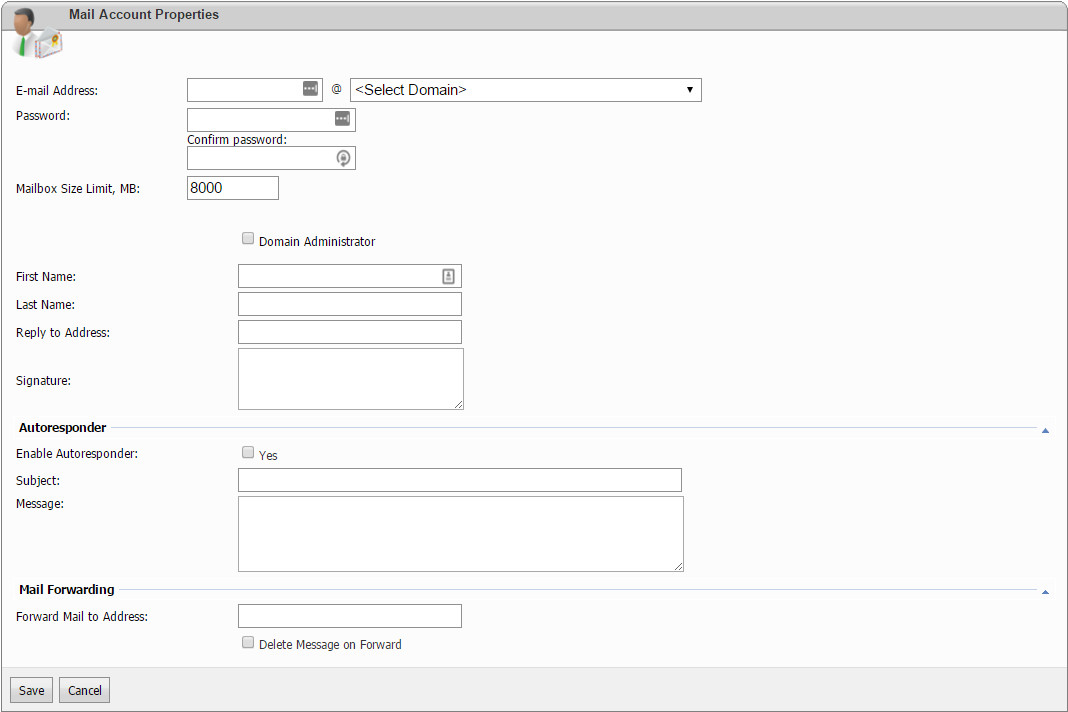
- Click 'Create Mail Account'
- Enter New Email
- Select Domain from drop down
- Create a New Password
- First Name
- Last Name
- Reply to Address
- Signature
- Click Save
Please Note: Email account names should be unique. e.g. If you have a POP3 account called "joe@ephost.com" you would not be able to add a Email Alias or Group email address with the same name.
Instructions for E-Mail Aliases
- Login to your web hosting account.
- Click on the Control Panel button for that hosting plan.
- You will be logged into the Control Panel automatically.
- Click on the Mail Icon >> Aliases
- Enter email and select domain of current email
- Enter the forwarding email address
- Click Save
Instructions for Mail Groups
- Login to your web hosting account.
- Click on the Control Panel button for that hosting plan.
- You will be logged into the Control Panel automatically.
- Click on the Mail Icon >> Groups
- Click 'Create Mail Group'
- Enter individual email and select domain
- Click Save
Also See: Email Settings POP3 / IMAP | Check email online | Email Troubleshooting | Adding an email to your hosting account WINDOWS / LINUX | Using MSOutlook 2003, 2007/2010, 2013/2016
Contact Support
If you are still having issues, please contact us for further help.
1-877-EPHOST1 | support@ephost.com


